> ## Documentation Index
> Fetch the complete documentation index at: https://docs.ocular.dev/llms.txt
> Use this file to discover all available pages before exploring further.
# Shiprocket
> Connect Shiprocket to Ocular using a dedicated API user email and the API key emailed to that user to sync shipments, courier costs, and RTO data.
**Required fields in Ocular:**
* **Email** – the API user email you registered in Shiprocket
* **API Key** – the key sent to that email after creating the API user
Follow the steps below to grab those two items and paste them into **Data Management → Connectors → Add connector → Shiprocket**.
A dedicated API-user email (different from your main Shiprocket login) and the API key emailed to it.
The Fulfilment data model — AWB-level data, courier costs, RTO status, pincode performance, and cost-discrepancy reconciliation.
***
## Step 1 · Create an API User in Shiprocket
Follow these steps to create an API user and receive your API key.
Log in to your Shiprocket seller panel.
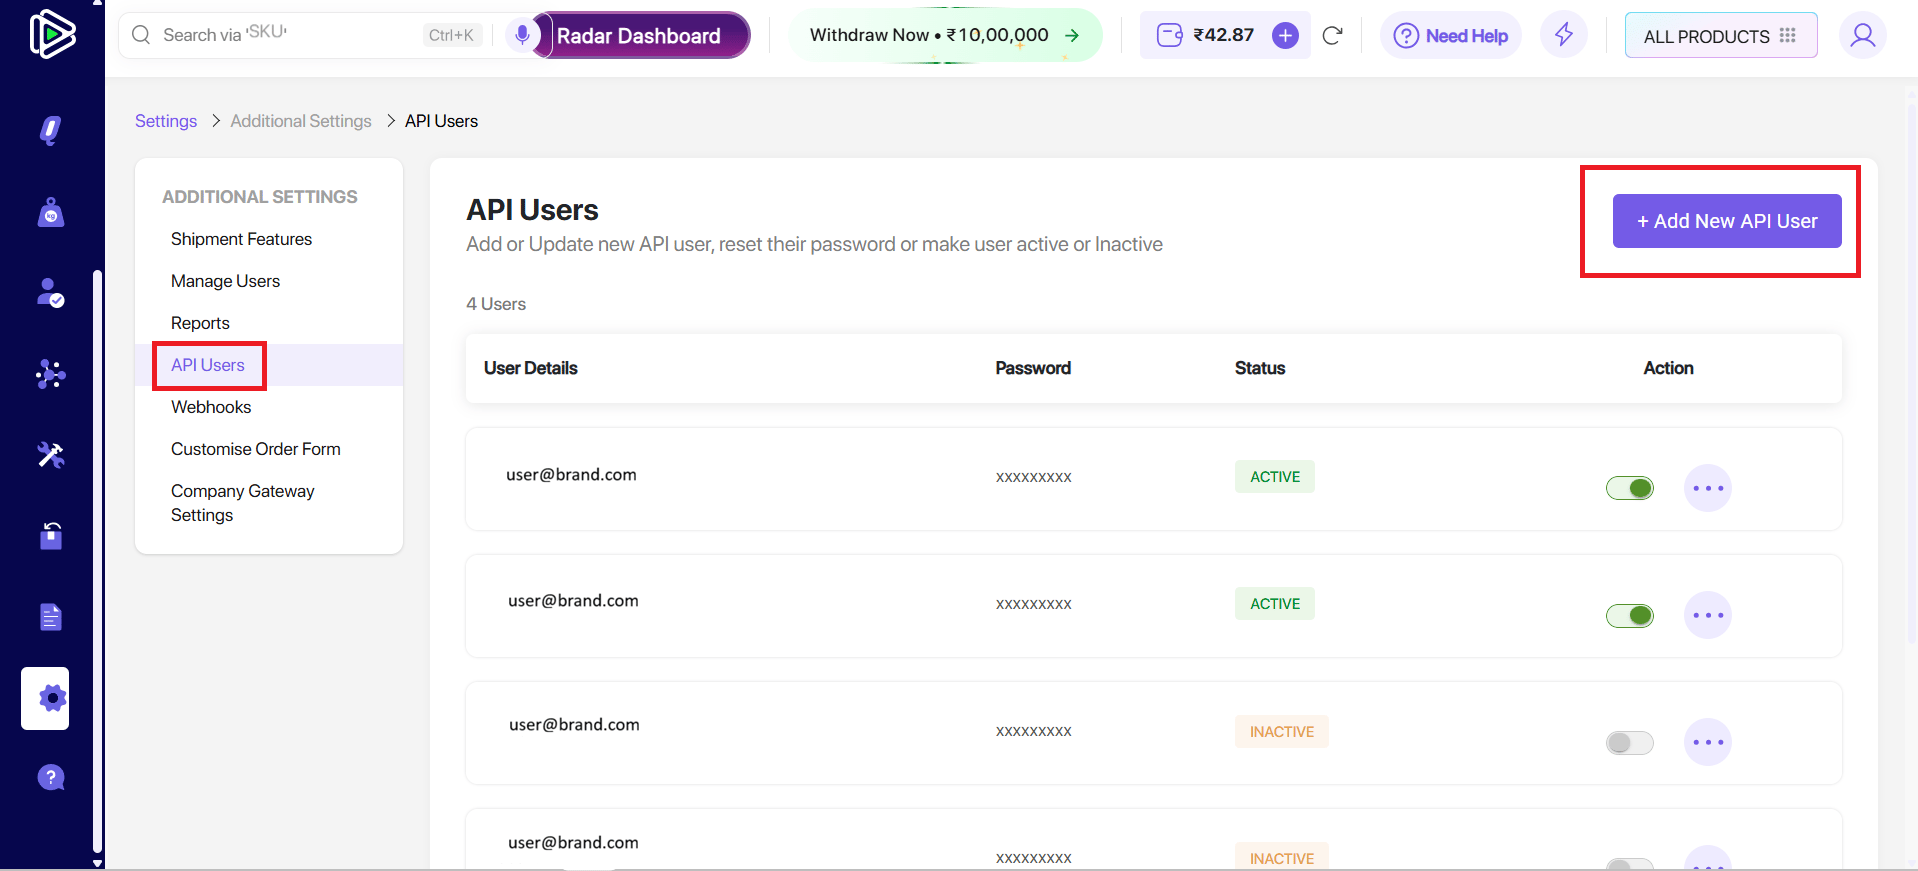
Navigate to **Settings → API Users**.
Navigate to **Settings → API Users**.
.png?fit=max&auto=format&n=q-V-PFkPr0MOCSrr&q=85&s=1537e41342a7c3ad2af25578007ac156) Click **Add new API User**.
Enter the required details (email, password, etc.).
Enter a **unique email address** that is different from the one used for your main Shiprocket login. Using the same email will cause the API user creation to fail.
Click **Add new API User**.
Click **Add new API User**.
Enter the required details (email, password, etc.).
Enter a **unique email address** that is different from the one used for your main Shiprocket login. Using the same email will cause the API user creation to fail.
Click **Add new API User**.
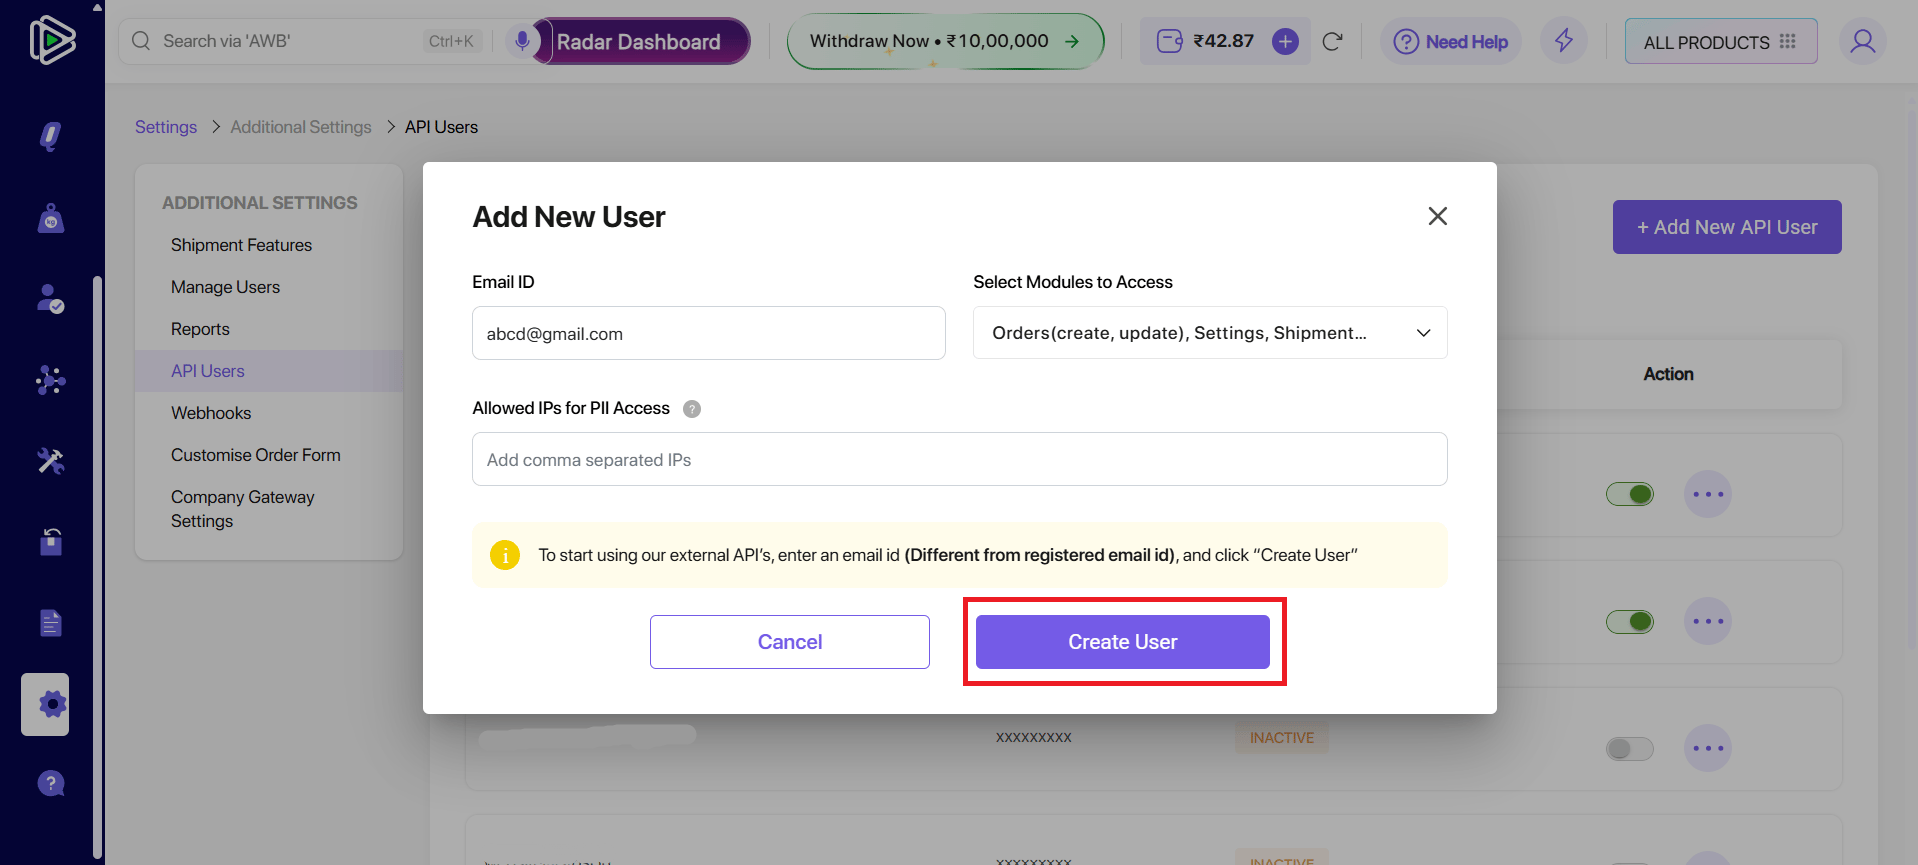
 Enter the required details (email, password, etc.).
Enter a **unique email address** that is different from the one used for your main Shiprocket login. Using the same email will cause the API user creation to fail.
Click **Create User**. The entered email address will receive an **API Key** from Shiprocket. Copy this key — you will paste it into Ocular.
Save the API key securely. If you lose it, you may need to create a new API user to generate a fresh key.
Click **Create User**. The entered email address will receive an **API Key** from Shiprocket. Copy this key — you will paste it into Ocular.
Save the API key securely. If you lose it, you may need to create a new API user to generate a fresh key.
Enter the required details (email, password, etc.).
Enter a **unique email address** that is different from the one used for your main Shiprocket login. Using the same email will cause the API user creation to fail.
Click **Create User**. The entered email address will receive an **API Key** from Shiprocket. Copy this key — you will paste it into Ocular.
Save the API key securely. If you lose it, you may need to create a new API user to generate a fresh key.
Click **Create User**. The entered email address will receive an **API Key** from Shiprocket. Copy this key — you will paste it into Ocular.
Save the API key securely. If you lose it, you may need to create a new API user to generate a fresh key.
 ***
## Step 2 · Plug the credentials into Ocular
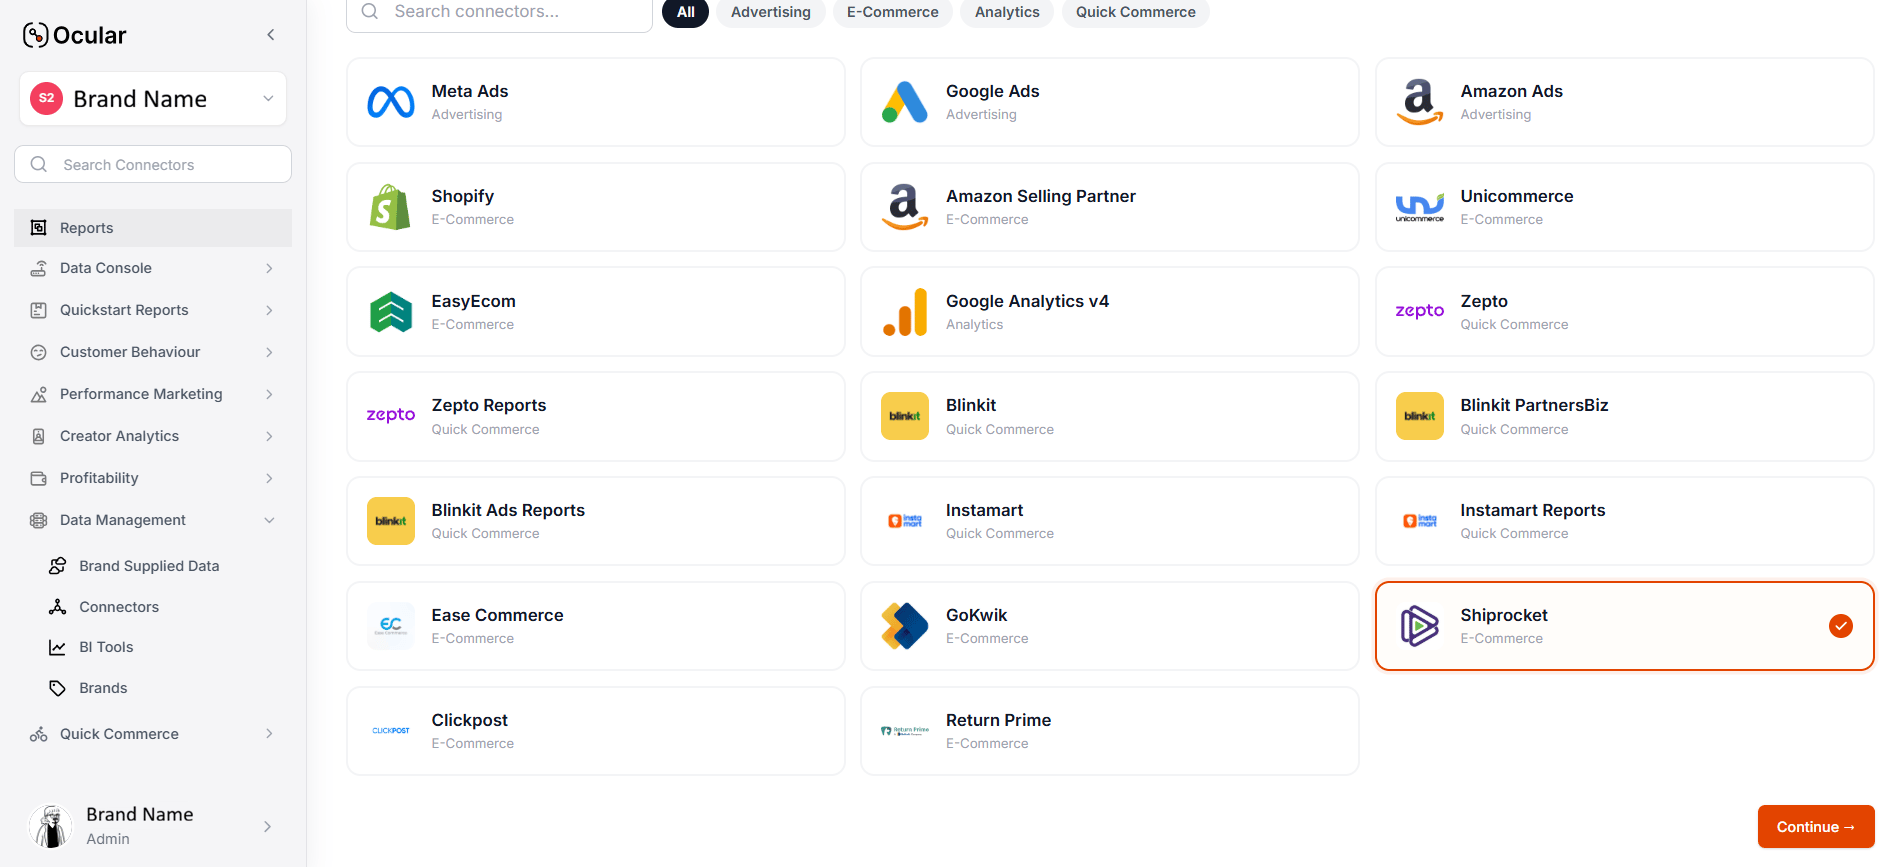
In Ocular, navigate to **Data Management → Connectors → Add connector → Shiprocket**.
In Ocular, navigate to **Data Management → Connectors → Add connector → Shiprocket**.
***
## Step 2 · Plug the credentials into Ocular
In Ocular, navigate to **Data Management → Connectors → Add connector → Shiprocket**.
In Ocular, navigate to **Data Management → Connectors → Add connector → Shiprocket**.
 Free-form label.
Auto-generated by Ocular.
YYYY-MM-DD — how far back in time Ocular should pull data from your Shiprocket account. Choose a date from which you want to begin analyzing your shipping data.
The number of past days from which data will be fetched during synchronization. This ensures that recent historical data is included and kept up to date. Default is 30 days.
Defines how often the connector will automatically sync data. Configured using a numeric value (frequency) along with a time unit (e.g., hours), determining the interval between each sync cycle.
Automatically triggers synchronization when the connector is enabled.
The API user email you registered in Shiprocket.
The key you received via email.
Free-form label.
Auto-generated by Ocular.
YYYY-MM-DD — how far back in time Ocular should pull data from your Shiprocket account. Choose a date from which you want to begin analyzing your shipping data.
The number of past days from which data will be fetched during synchronization. This ensures that recent historical data is included and kept up to date. Default is 30 days.
Defines how often the connector will automatically sync data. Configured using a numeric value (frequency) along with a time unit (e.g., hours), determining the interval between each sync cycle.
Automatically triggers synchronization when the connector is enabled.
The API user email you registered in Shiprocket.
The key you received via email.
Free-form label.
Auto-generated by Ocular.
YYYY-MM-DD — how far back in time Ocular should pull data from your Shiprocket account. Choose a date from which you want to begin analyzing your shipping data.
The number of past days from which data will be fetched during synchronization. This ensures that recent historical data is included and kept up to date. Default is 30 days.
Defines how often the connector will automatically sync data. Configured using a numeric value (frequency) along with a time unit (e.g., hours), determining the interval between each sync cycle.
Automatically triggers synchronization when the connector is enabled.
The API user email you registered in Shiprocket.
The key you received via email.
Free-form label.
Auto-generated by Ocular.
YYYY-MM-DD — how far back in time Ocular should pull data from your Shiprocket account. Choose a date from which you want to begin analyzing your shipping data.
The number of past days from which data will be fetched during synchronization. This ensures that recent historical data is included and kept up to date. Default is 30 days.
Defines how often the connector will automatically sync data. Configured using a numeric value (frequency) along with a time unit (e.g., hours), determining the interval between each sync cycle.
Automatically triggers synchronization when the connector is enabled.
The API user email you registered in Shiprocket.
The key you received via email.
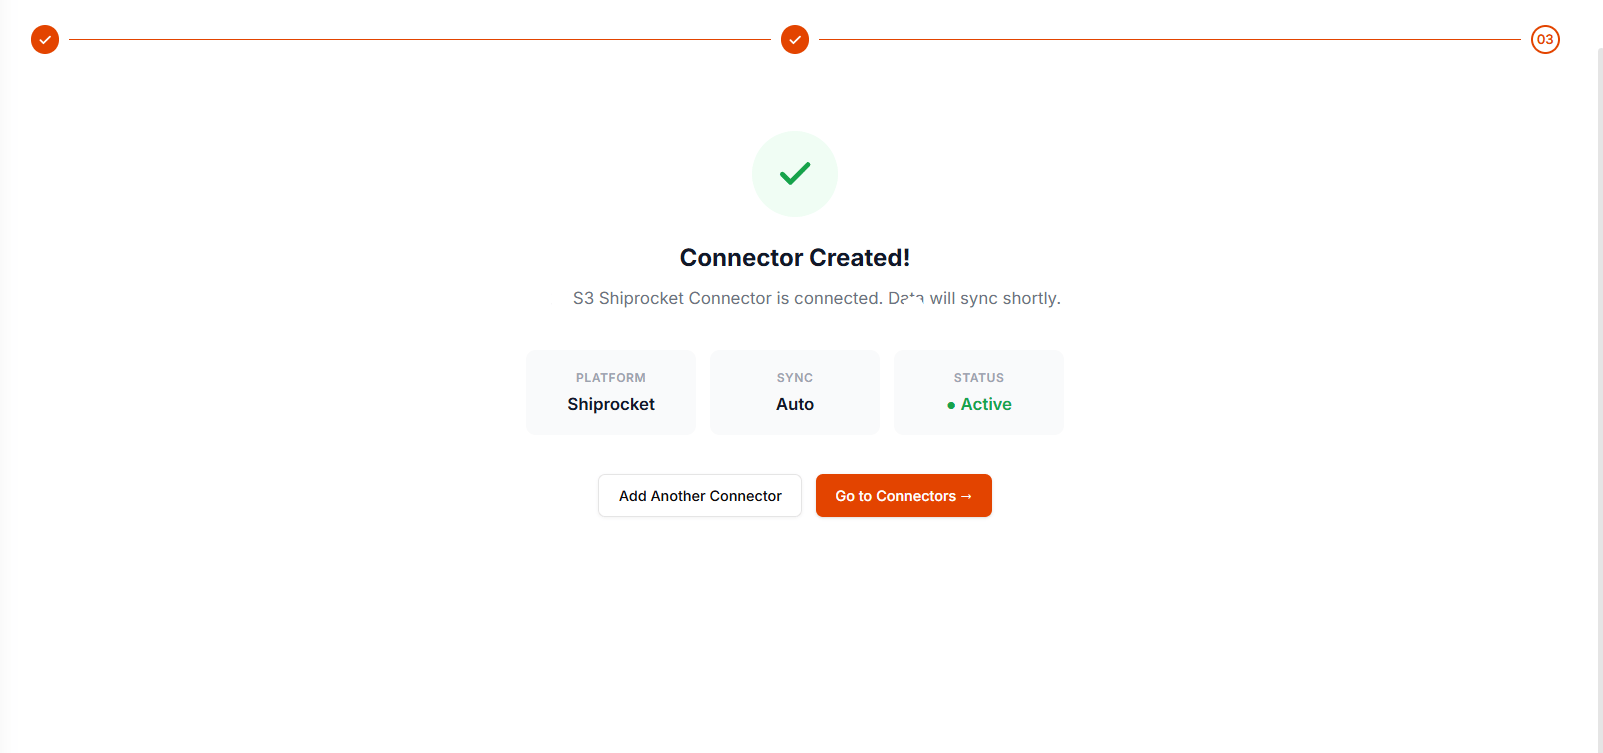
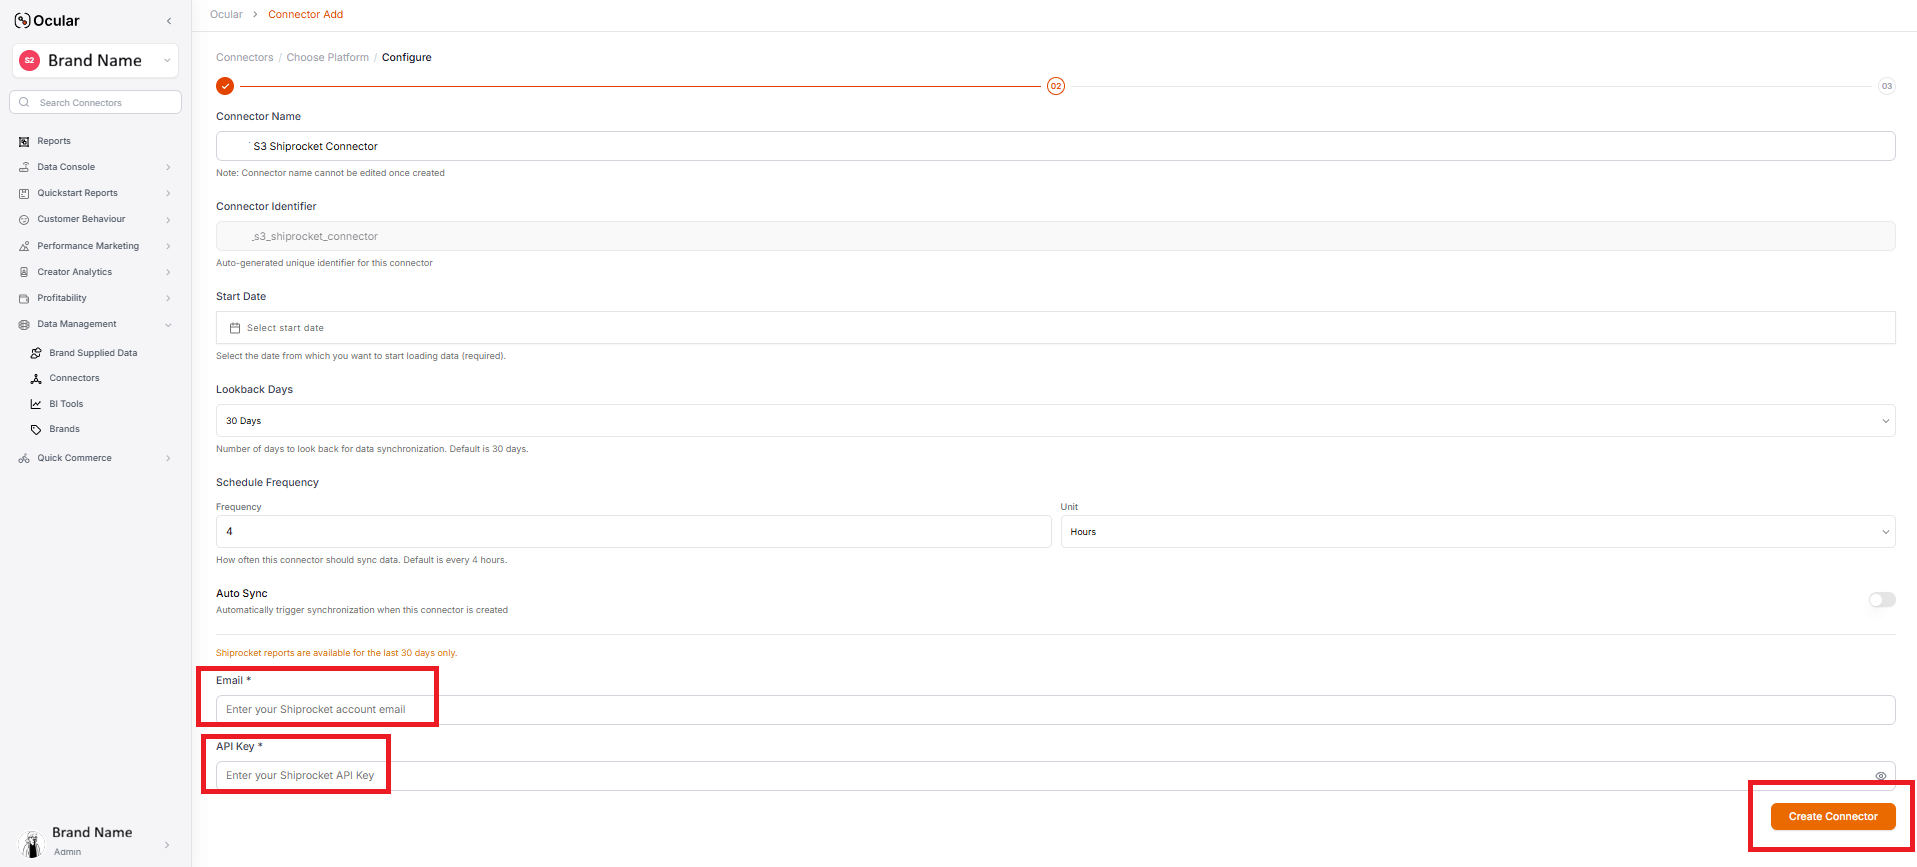 Click **Create Connector**. Ocular stores the credentials in its encrypted vault and triggers the first sync.
{/* TODO: image asset missing — /images/image-(152)-(1).png not present in repo. Re-add when available. */}
Click **Create Connector**. Ocular stores the credentials in its encrypted vault and triggers the first sync.
Click **Create Connector**. Ocular stores the credentials in its encrypted vault and triggers the first sync.
{/* TODO: image asset missing — /images/image-(152)-(1).png not present in repo. Re-add when available. */}
Click **Create Connector**. Ocular stores the credentials in its encrypted vault and triggers the first sync.
 ***
## Troubleshooting
Almost always because the email you entered matches your main Shiprocket login. Use a unique address — e.g., `ocular-api@your-domain.com`.
Check spam and confirm the email address is correct. If the key still doesn't arrive, regenerate by deleting and recreating the API user in **Settings → API Users**.
If you've created a new API user or rotated the key, update both **Email** and **API Key** in the connector form and re-test.
For ticket-writing format when filing a connector issue, see [Working with the Ocular team → Connector-not-working tickets](/overview/working-with-the-ocular-team).
***
## Troubleshooting
Almost always because the email you entered matches your main Shiprocket login. Use a unique address — e.g., `ocular-api@your-domain.com`.
Check spam and confirm the email address is correct. If the key still doesn't arrive, regenerate by deleting and recreating the API user in **Settings → API Users**.
If you've created a new API user or rotated the key, update both **Email** and **API Key** in the connector form and re-test.
For ticket-writing format when filing a connector issue, see [Working with the Ocular team → Connector-not-working tickets](/overview/working-with-the-ocular-team).