> ## Documentation Index
> Fetch the complete documentation index at: https://docs.ocular.dev/llms.txt
> Use this file to discover all available pages before exploring further.
# EasyEcom
> Connect EasyEcom to Ocular using your username, password, X-API-Key, and Location Key to sync orders, inventory, and fulfilment data.
**Required fields in Ocular:**
* **Username** – your EasyEcom account username
* **Password** – the password for your EasyEcom account
* **X-API-Key** – the API key generated from your EasyEcom account
* **Location Key** – the location/warehouse key from your EasyEcom account
Follow the three sections below: grab each credential from EasyEcom, then paste them into **Data Management → Connectors → Add connector → EasyEcom**.
Username, password, X-API-Key, and Location Key from your EasyEcom account.
OMS orders, inventory levels, and fulfilment data flowing into Sales Performance and the P\&L.
***
## Step 1 · Connector Setup Details
When adding the connector, Ocular will ask you to fill in the following fields:
Give this connector a unique, recognisable name (e.g., `easyecom_main`). This cannot be changed after creation, so choose carefully.
Auto-generated by Ocular. No action needed.
YYYY-MM-DD — choose the date from which you want Ocular to begin pulling your EasyEcom data.
The number of days for which Ocular will keep refreshing past data (default is 30 days). This is particularly useful for orders whose status updates — such as returns or fulfilment changes — may come in several days after the original order date.
Defines how often Ocular syncs your EasyEcom data. Set the **Frequency** (a numeric value) and the **Unit** (e.g., Hours) together to control the sync interval. Default is every 4 hours.
Toggle this on if you want Ocular to begin syncing automatically as soon as the connector is created.
***
## Step 2 · Find your EasyEcom credentials
### Username & Password
These are the same credentials you use to log in to your EasyEcom account at [app.easyecom.io](https://app.easyecom.io/).
It is recommended to create a dedicated user for Ocular (e.g., `ocular_api`) with the necessary permissions, rather than using a personal login.
 ### X-API-Key
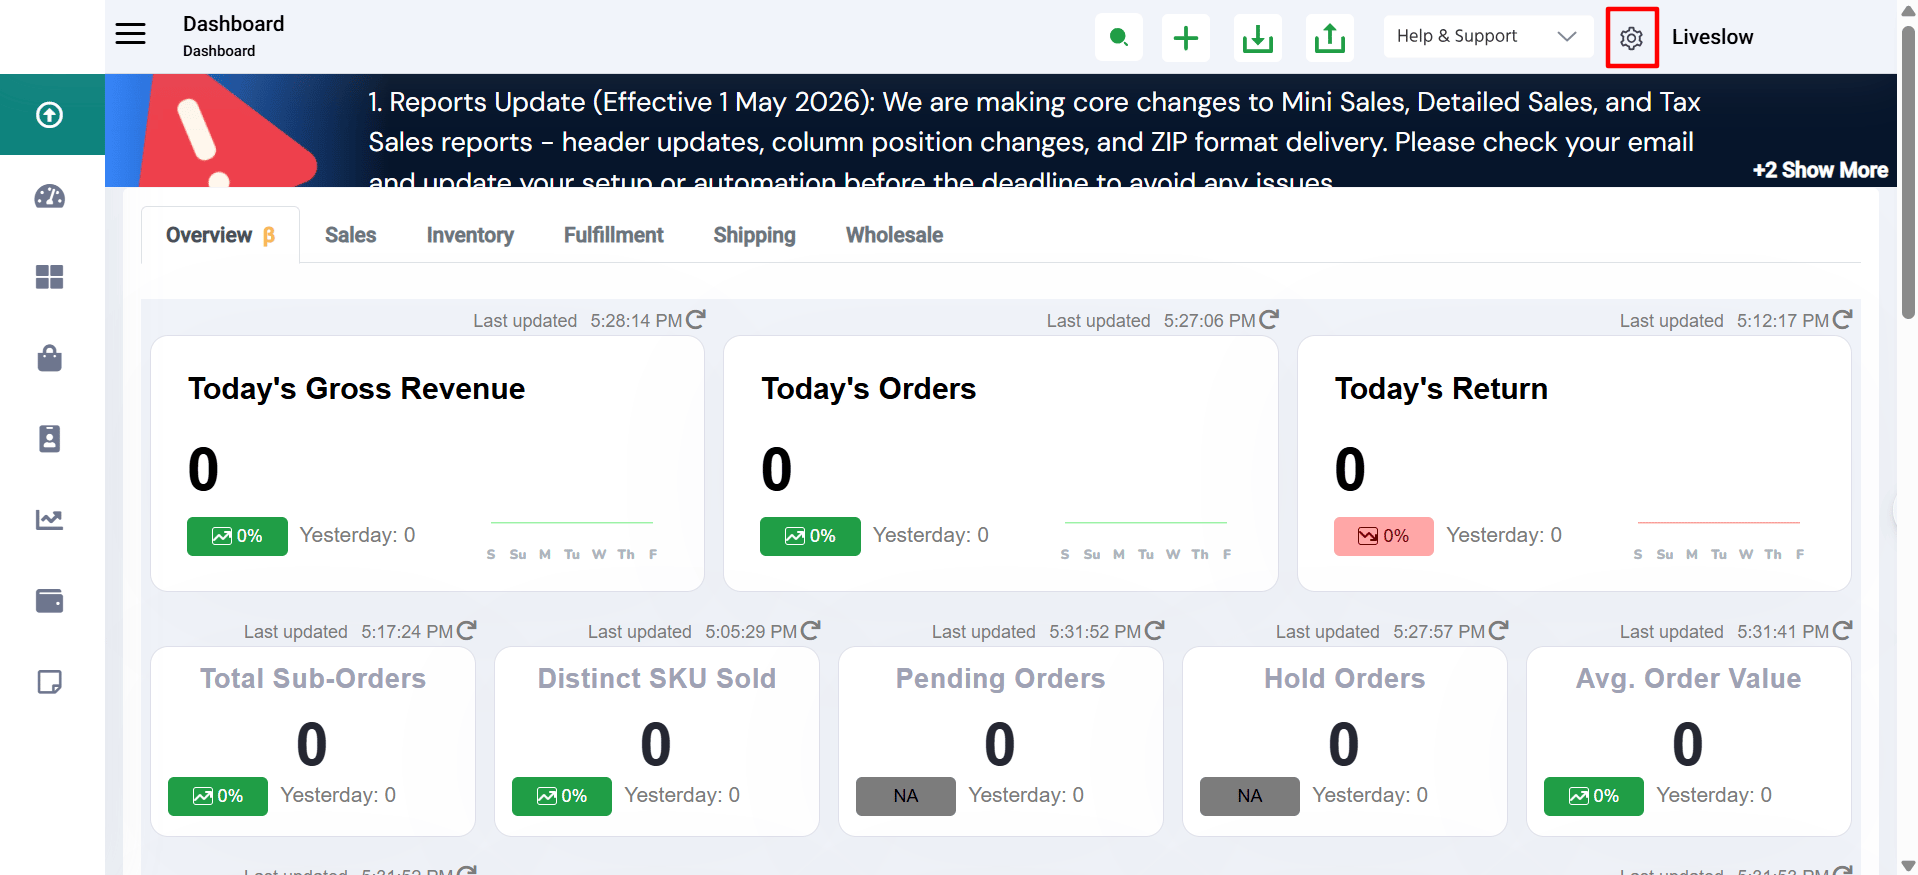
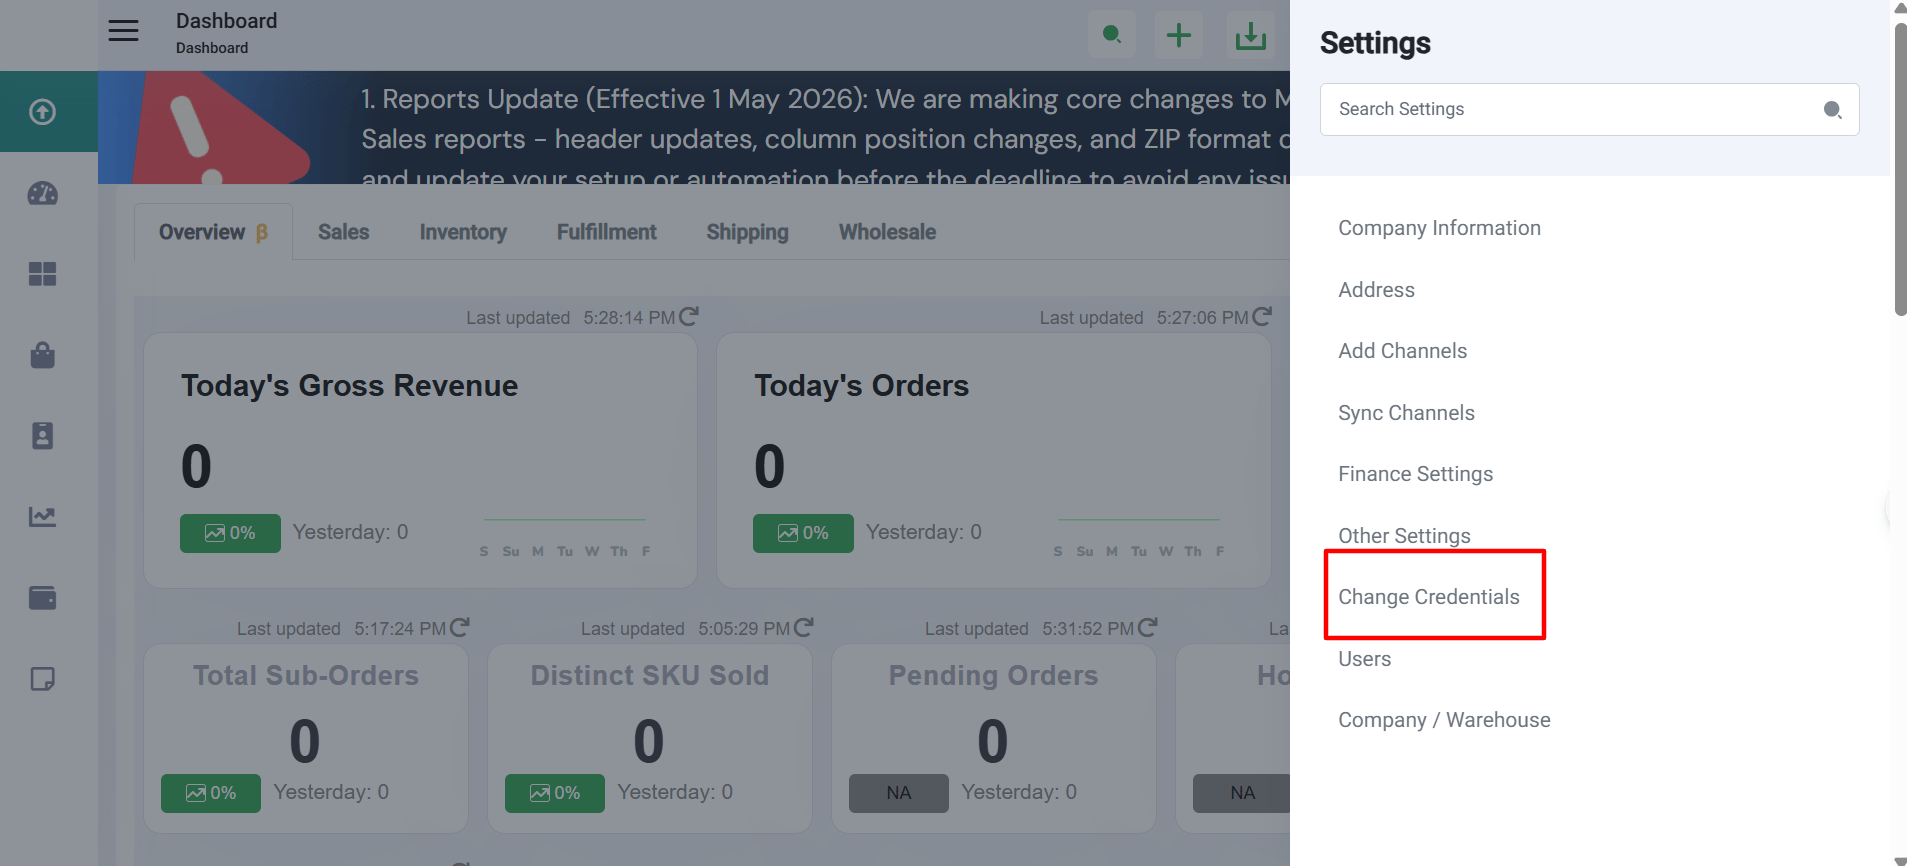
Log in to EasyEcom and go to **Settings → API & Webhooks** (or **Integrations → API Access**, depending on your account version).
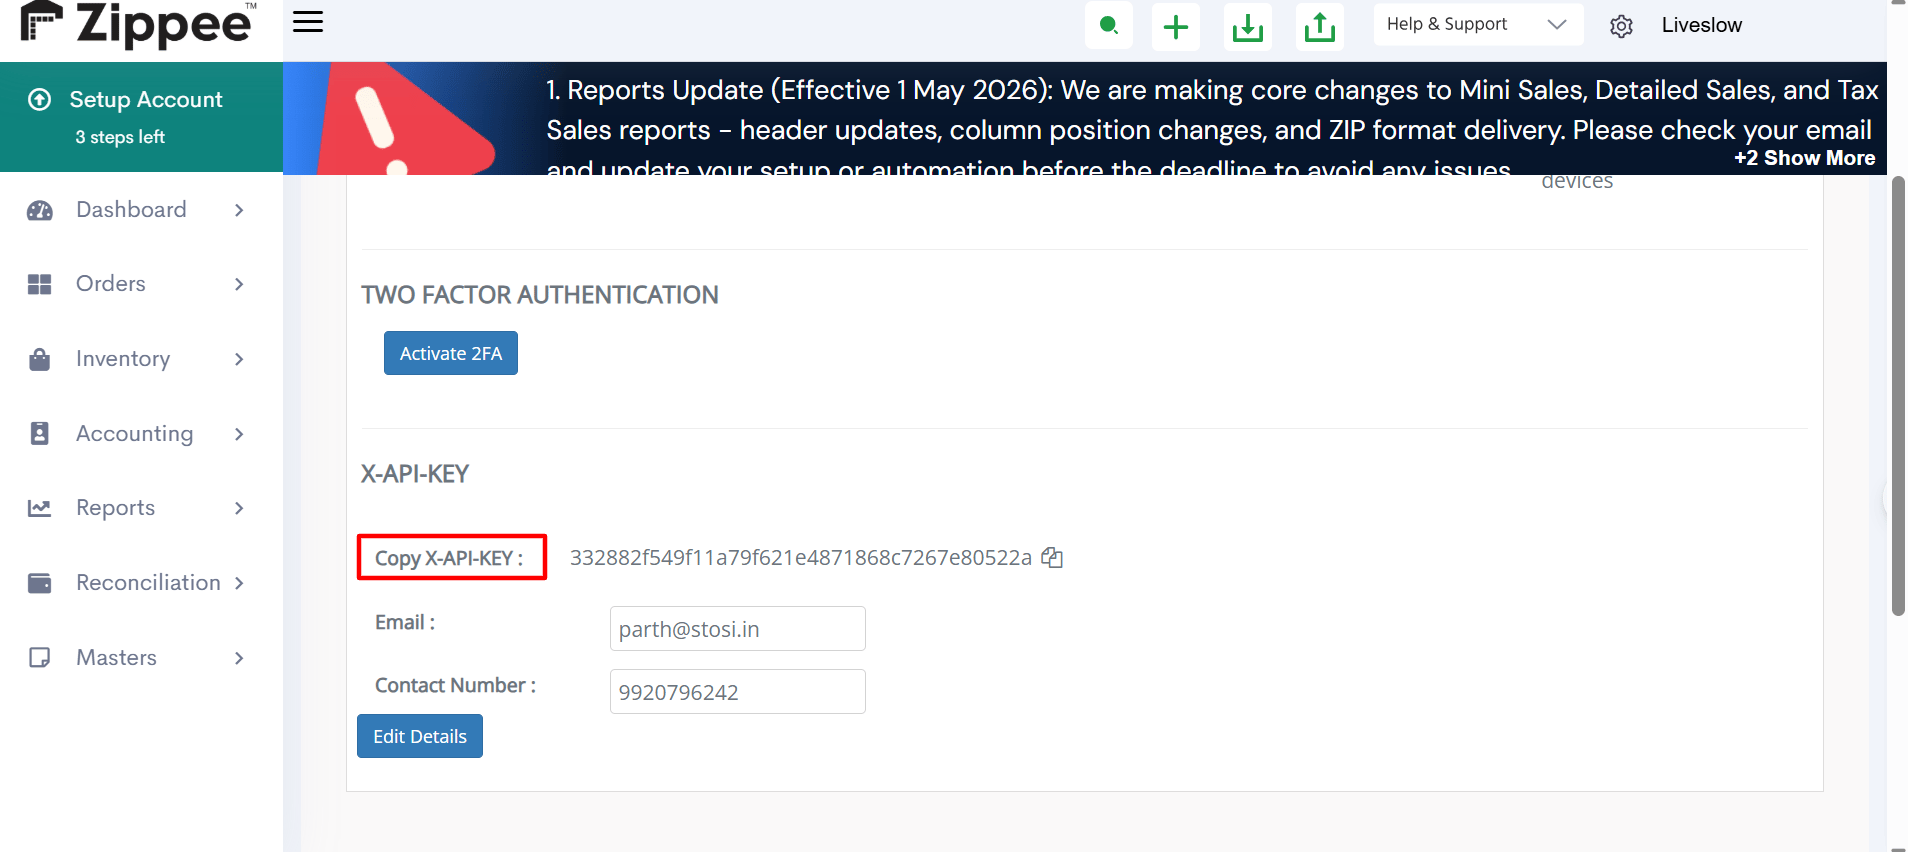
Copy the **X-API-Key** shown on that page. If no key exists, click **Generate** to create one.
Keep this key secure — it grants API-level access to your EasyEcom account.
### X-API-Key
Log in to EasyEcom and go to **Settings → API & Webhooks** (or **Integrations → API Access**, depending on your account version).
Copy the **X-API-Key** shown on that page. If no key exists, click **Generate** to create one.
Keep this key secure — it grants API-level access to your EasyEcom account.
 ### Location Key
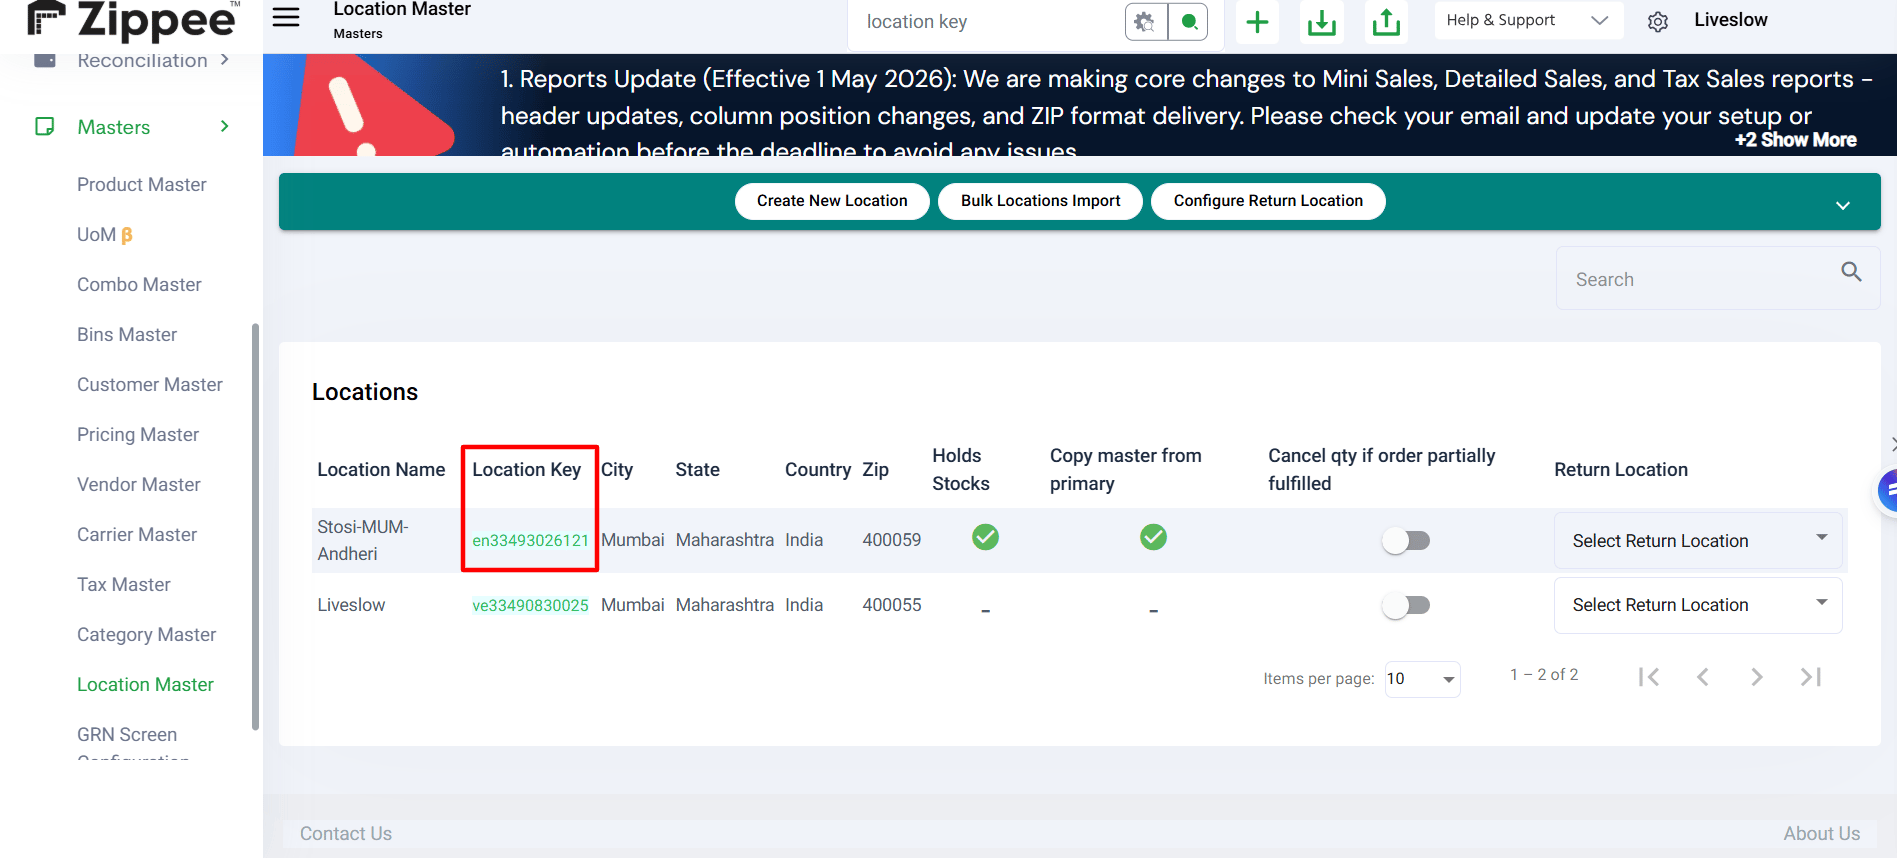
In EasyEcom, go to **Settings → Warehouses / Locations**.
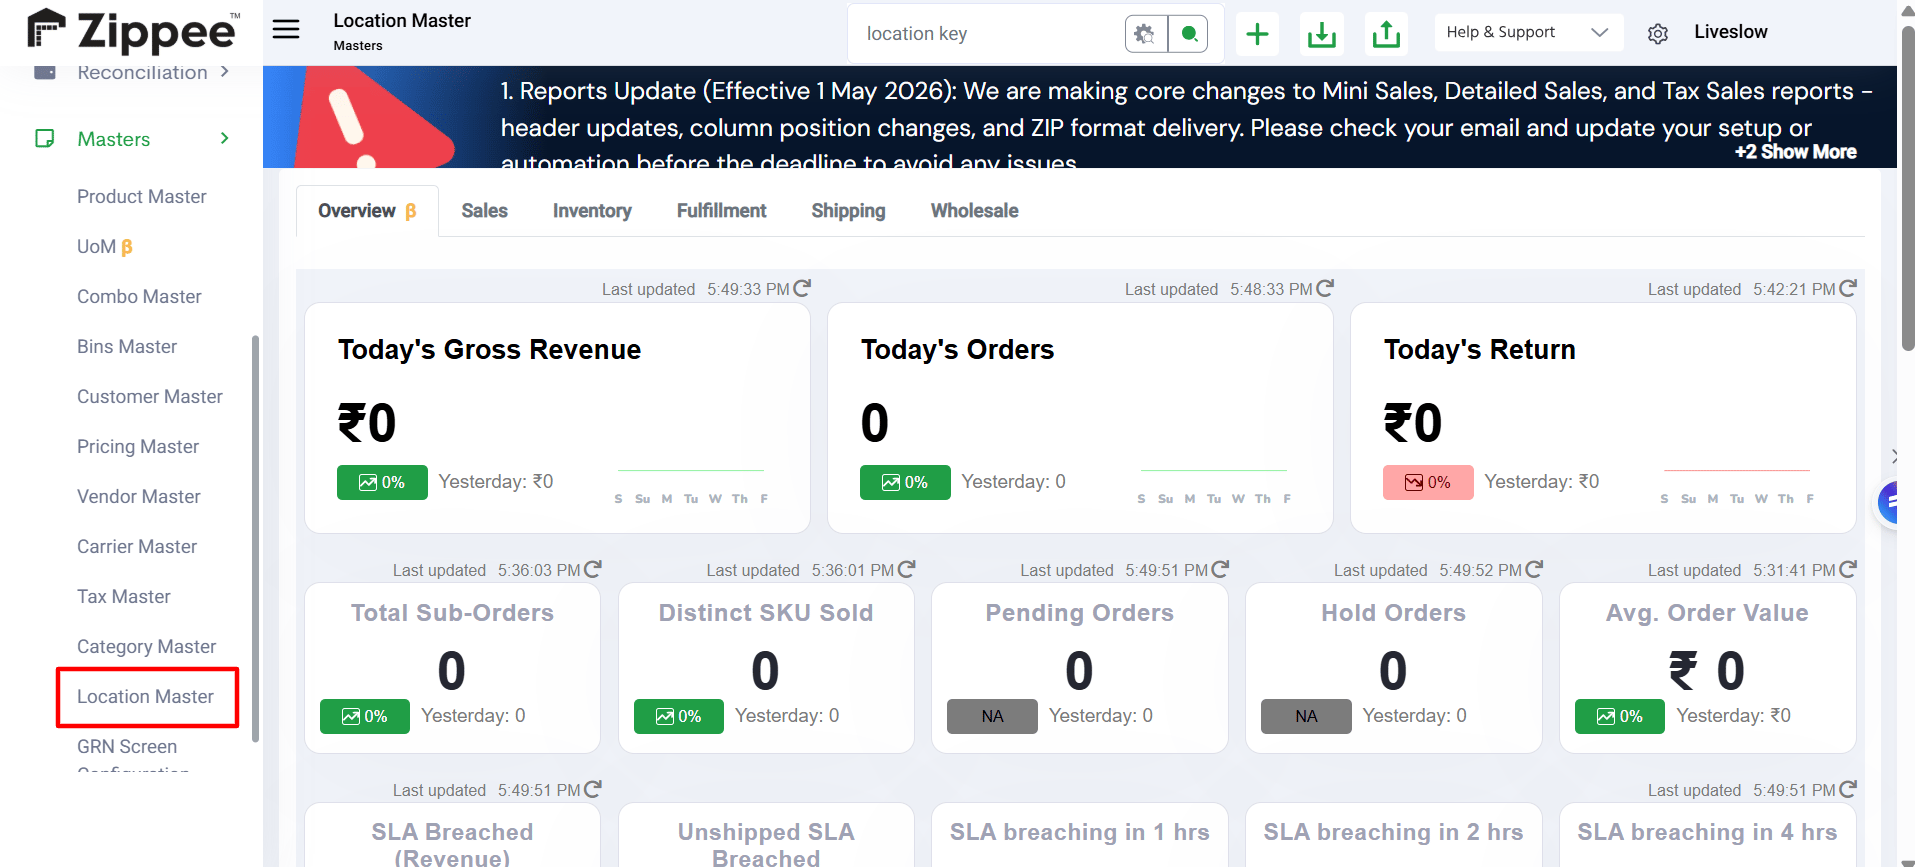
Each warehouse or fulfilment location in your account has a unique **Location Key**. Copy the key for the location whose data you want Ocular to pull. If you want data from multiple locations, you can add them as separate connectors.
### Location Key
In EasyEcom, go to **Settings → Warehouses / Locations**.
Each warehouse or fulfilment location in your account has a unique **Location Key**. Copy the key for the location whose data you want Ocular to pull. If you want data from multiple locations, you can add them as separate connectors.
 If you are unsure where to find the X-API-Key or Location Key in your specific EasyEcom plan, contact EasyEcom support or check their API documentation at [developers.easyecom.io](https://developers.easyecom.io/).
***
## Step 3 · Plug the credentials into Ocular
In Ocular, open **Data Management → Connectors → Add connector → EasyEcom**.
In Ocular, open **Data Management → Connectors → Add connector → EasyEcom**.
If you are unsure where to find the X-API-Key or Location Key in your specific EasyEcom plan, contact EasyEcom support or check their API documentation at [developers.easyecom.io](https://developers.easyecom.io/).
***
## Step 3 · Plug the credentials into Ocular
In Ocular, open **Data Management → Connectors → Add connector → EasyEcom**.
In Ocular, open **Data Management → Connectors → Add connector → EasyEcom**.
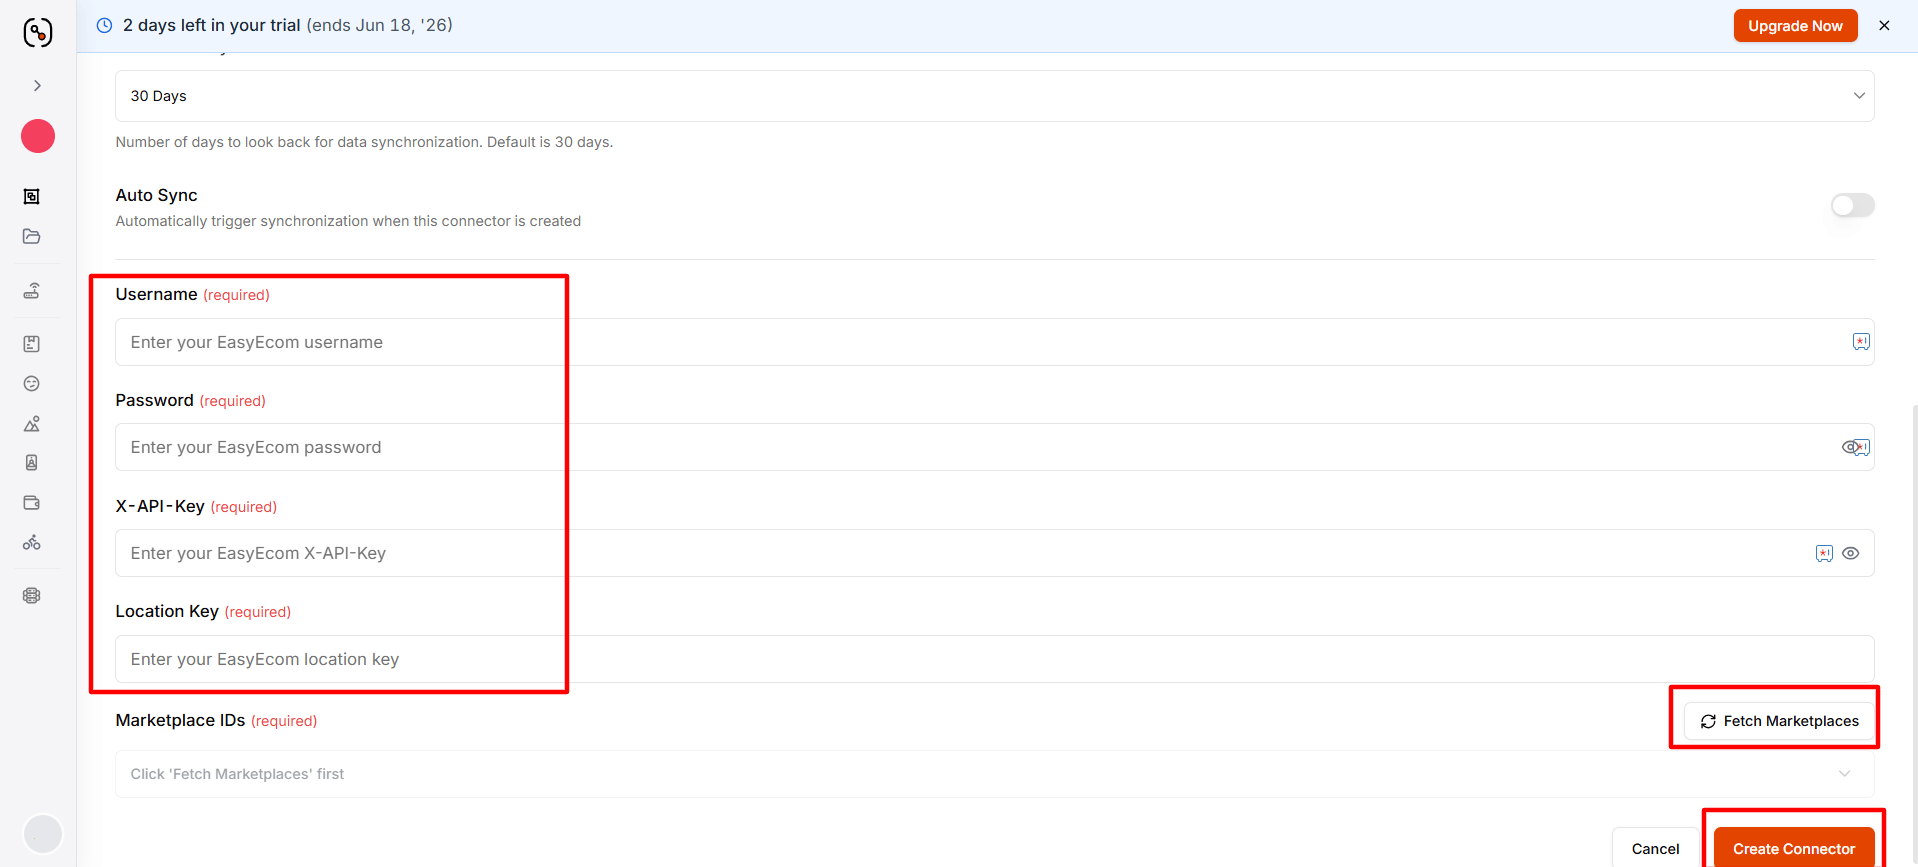 Your EasyEcom account username.
The password for that account.
The API key from Step 2.
The location key from Step 2.
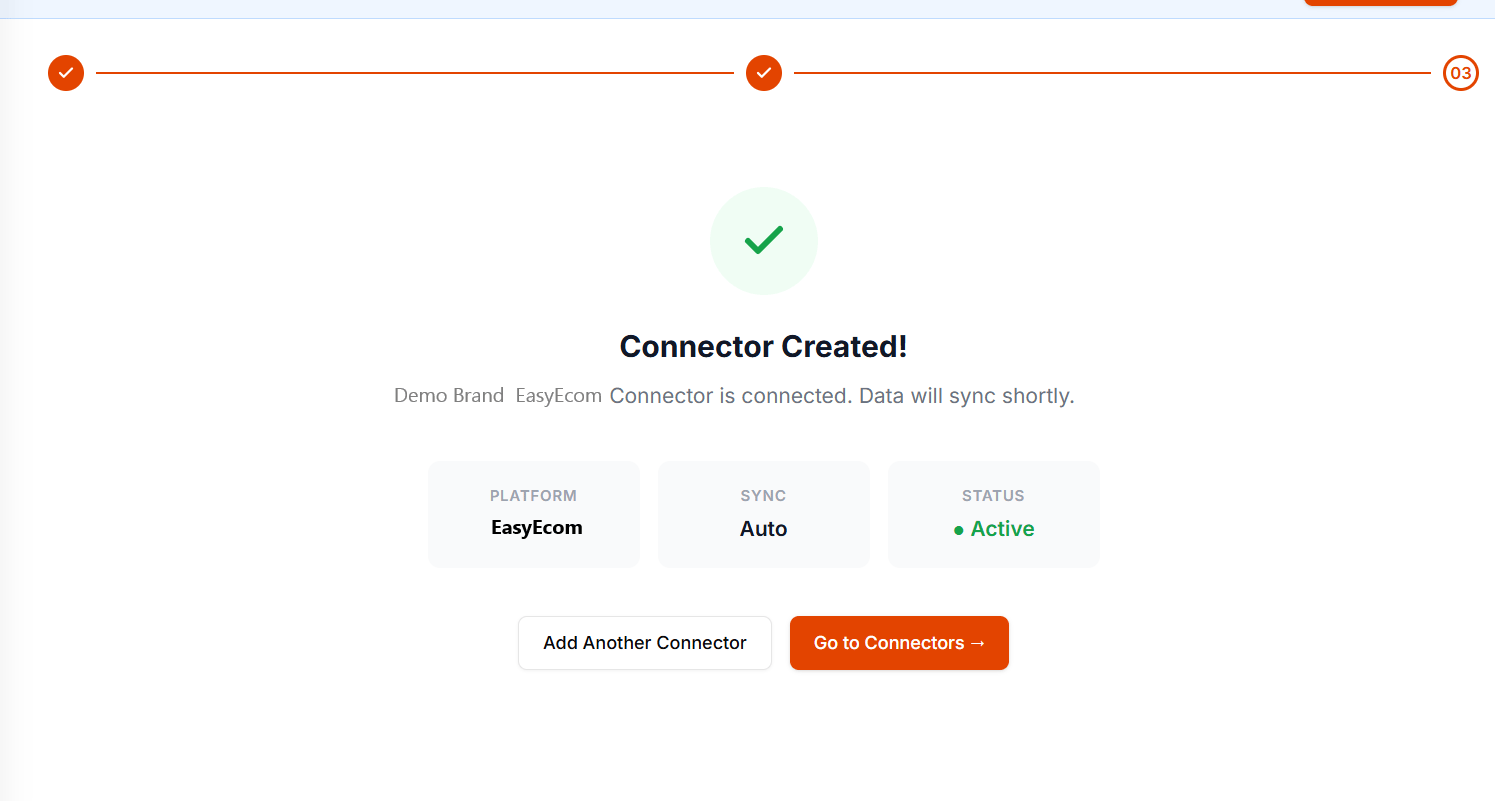
Click **Create Connector**. Ocular authenticates against the EasyEcom API; on success, you'll see **Connection successful**.
Click **Create**. Your credentials are encrypted in Ocular's vault; your first incremental sync kicks off within minutes.
Click **Create**. Your credentials are encrypted in Ocular's vault; your first incremental sync kicks off within minutes.
Your EasyEcom account username.
The password for that account.
The API key from Step 2.
The location key from Step 2.
Click **Create Connector**. Ocular authenticates against the EasyEcom API; on success, you'll see **Connection successful**.
Click **Create**. Your credentials are encrypted in Ocular's vault; your first incremental sync kicks off within minutes.
Click **Create**. Your credentials are encrypted in Ocular's vault; your first incremental sync kicks off within minutes.
 For ticket-writing format when filing a connector issue, see [Working with the Ocular team → Connector-not-working tickets](/overview/working-with-the-ocular-team).